We are thrilled to welcome you as a valued customer and congratulate you on your recent purchase!
This comprehensive installation guide is designed to assist you in setting up your new software quickly and efficiently. We understand that the installation process can sometimes be daunting, but rest assured, we have broken down each step into clear, easy-to-follow instructions.
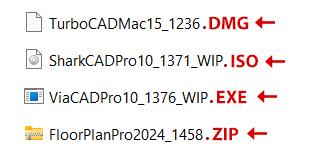
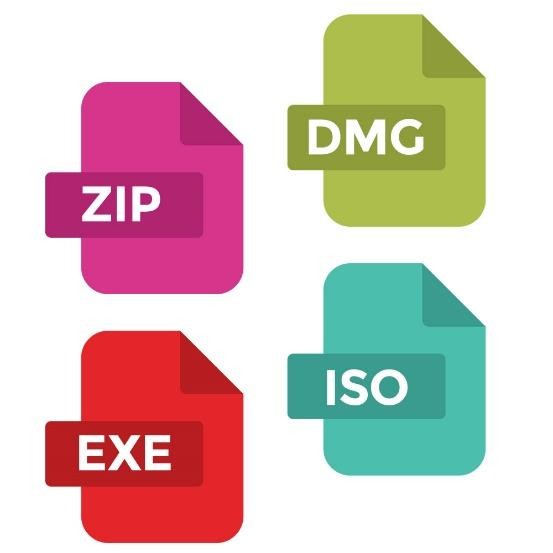 Note: Not all the installation steps below will apply to your order. To determine which steps to follow, check the type of installer you downloaded. You can find this information at the end of the download link you received with your order or by examining the file after downloading it (files are usually saved in the Downloads folder).
For some orders, you won’t get a download link. Instead, you’ll receive a serial key to unlock an add-on or plug-in within the software. Please follow the activation instructions for your key.
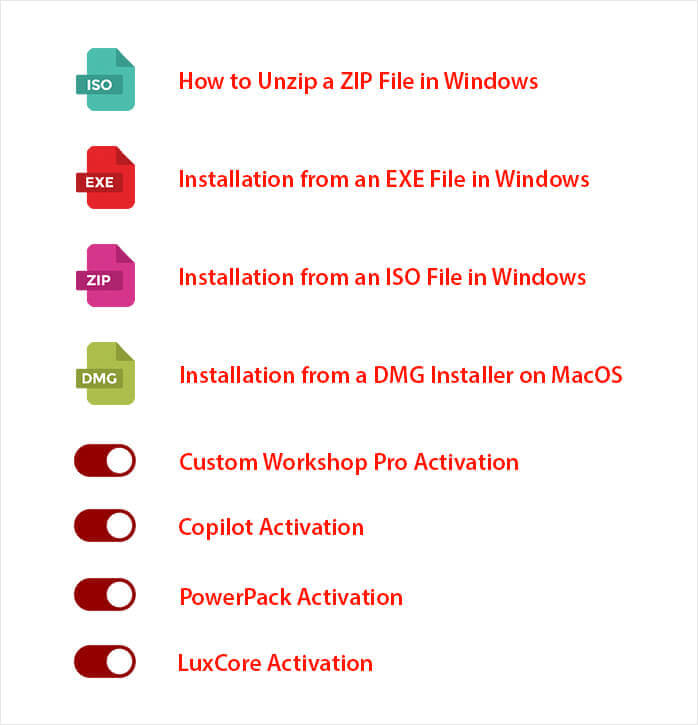
 How to unzip a ZIP file in Windows
You may have received a ZIP file with your order. Here are the steps to unzip a ZIP file in Windows:
- Open File Explorer and navigate to the folder where the ZIP file is saved.
- Right-click on the ZIP file you want to unzip.
- From the context menu that appears, select the option labelled Extract All…
- Choose Destination Folder: A window will pop up asking where you want to extract the files. You can either accept the default location or click Browse… to choose a different folder.
- Once you’ve chosen the destination folder, click the Extract button. The files will be extracted to the specified location.
- Navigate to the destination folder you selected to find your unzipped files.
- Double-click on the installer (.exe or .iso) file located in this folder. Also see How to install Software from an EXE file in Windows or Installation from an ISO file in Windows.
If you prefer using a different method to unzip files, you can also use built-in tools like Windows PowerShell or third-party software like WinRAR or 7-Zip for more advanced options. If you encounter any issues during the installation, contact customer support for assistance.
 Installation from an EXE file in Windows
You may have received an EXE file with your order. Here are the steps to install your product in Windows:
- First, download the .exe installer file from the link you have been sent.
- Open File Explorer and navigate to the folder where the .exe file is saved. This is usually the Downloads folder.
- Double-click the .exe file to start the installation process. If prompted by User Account Control (UAC), click Yes to allow the installer to make changes to your device.
- Follow the Installation Wizard: A setup wizard will appear. Follow the on-screen instructions to proceed with the installation. This typically involves:
- Accepting the License Agreement: Read through the terms and conditions, then click I Agree or Accept to continue.
- Choosing the Installation Location: Accept the default or click Browse to select another folder.
- Selecting Additional Options: Choose options like a desktop shortcut, then click Next or Install.
- Wait for the installation to complete. A progress bar may appear. This process may take a few minutes.
- Once the installation is complete, a confirmation screen will appear. Click Finish to exit. Some installers may launch the app immediately.
- Launch the Application: You can now find the installed app in the Start menu or desktop. Double-click to run it.
If you encounter any issues during the installation, contact customer support for assistance.
 Installation from an ISO file in Windows
You may have received an ISO file with your order. Here are the steps to install your product in Windows:
- First, download the .ISO installer file from the link you have been sent.
- Open File Explorer and navigate to the folder where the .ISO file is saved. This is usually the Downloads folder.
- Mount the .ISO File: Open File Explorer and navigate to the folder where the .ISO file is saved.
- Right-click the .ISO file and select Mount from the context menu. This will create a virtual drive that contains the installation files.
- Open the Virtual Drive: In File Explorer, you will see a new drive under This PC or My Computer that represents the mounted .ISO file. Double-click this drive to open it.
- Inside the virtual drive, look for a file named setup.exe or similar. Double-click this file to start the installation process. If prompted by UAC, click Yes to allow changes.
- Follow the Installation Wizard: A setup wizard will appear. Follow the on-screen instructions:
- Accepting the License Agreement: Read and click I Agree or Accept.
- Choosing the Installation Location: Use default or click Browse to select a different folder.
- Selecting Additional Options: Choose preferences (e.g., shortcuts), then click Next or Install.
- Wait for the Installation to Complete. This may take a few minutes. A progress bar will indicate status.
- Once the installation is complete, click Finish. Some installers may offer to launch the app now.
- Launch the Application: Look for the app in your Start menu or on the desktop. Double-click to start using it.
If you encounter any issues during the installation, contact customer support for assistance.
 Installation from a DMG Installer on macOS
You may have received a DMG file with your order. Here are the steps to install your product on macOS:
- Download the DMG File: First, download the DMG file from the link you have been sent.
- Open Finder and navigate to the folder where the DMG file is saved. This is usually the Downloads folder.
- Double-click the DMG file to open it. This will mount the DMG file as a virtual disk on your desktop and open a new Finder window showing its contents.
- Drag the Application to the Applications Folder: In the Finder window that opens, you will typically see the application icon and a shortcut to the Applications folder. Drag the application icon to the Applications folder shortcut.
- Eject the DMG File: Once the application has been copied, you can eject the DMG file. Right-click the mounted DMG disk on your desktop and select Eject or click the eject button next to the DMG in the Finder sidebar.
- Launch the Application: Open the Applications folder in Finder, locate the newly installed application, and double-click it to launch. The first time you open the application, you may see a warning that the app was downloaded from the internet. Click Open to proceed.
- Complete Initial Setup: Follow any on-screen instructions to complete the initial setup of the application. This may include accepting a license agreement or configuring initial settings.
If you encounter any issues during the installation, contact customer support for assistance.
 Custom WorkShop Pro Activation
Please follow these steps to activate Custom WorkShop Pro available for Punch!® Home & Landscape Design, FloorPlan®, and ARCHITECT 3D®.
- After you have installed and registered your program, please follow these steps to activate your Custom WorkShop Pro (CWP) module.
- Open your software.
- Click on the Continue button on the QuickStart screen.
- Click on Help, then select Custom Workshop Pro Registration.
.jpg) Custom Workshop Pro Activation
Custom Workshop Pro Activation
If you encounter any issues during the installation, contact customer support for assistance.
Copilot Activation
Please follow these steps to activate Copilot available for TurboCAD® Windows, TurboCAD® Mac, ViaCAD®, and SharkCAD®.
- The Copilot registration dialog can be accessed from the Help menu by clicking on Copilot Registration. This will open a Registration dialog.
 Copilot Activation
 - Enter your Name, Email, Organization (optional), and the License Key you received with your order.
- Click on Activate to activate Copilot.
If you encounter any issues during the installation, contact customer support for assistance.
PowerPack Activation
Please follow these steps to activate PowerPack available for TurboCAD® Mac and ViaCAD®.
- Launch the application from your Applications folder or Dock.
- Once the application is open, go to the menu bar at the top of the screen. Click on the Tools menu, and then select PowerPack from the dropdown menu.
- In the PowerPack menu, you will see an option to Activate PowerPack. Click on this option.
- A dialog box will appear prompting you to enter your activation code. Enter the activation code you received when you purchased the PowerPack. This code is usually sent to you via email or provided in your purchase confirmation.
- After entering the code, click Activate or OK.
- Once the activation is successful, you will receive a confirmation message. The additional tools and features provided by the PowerPack will now be available in your application.
If you encounter any issues during the installation, contact customer support for assistance.
LuxCore Activation
Please follow these steps to activate LuxCore® Plug-In available for Floorplan®.
- Launch the application from your Applications folder or Dock.
- Once the application is open, go to the menu bar at the top of the screen. Click on the Tools menu, and then select LuxCore from the dropdown menu.
- In the LuxCore menu, you will see an option to Activate LuxCore. Click on this option.
- A dialog box will appear prompting you to enter your activation code. Enter the activation code you received when you purchased the LuxCore Add-On. This code is usually sent to you via email or provided in your purchase confirmation.
- After entering the code, click Activate or OK.
- Once the activation is successful, you will receive a confirmation message. The additional tools and features provided by the PowerPack will now be available in your application.
If you encounter any issues during the installation, contact customer support for assistance.